Just a couple pics of the Deadbolt as of recently.
My Axial 1/10th scale RTR SCX10 Deadbolt. Fun crawler right out of the box.
My Deadbolt
Deadbolt, Axial Beadlocks, Pro-Line Interco TSL SX Super Swamper 1.9" Rock Crawler Tires (G8 compound)
Showing posts with label scx10. Show all posts
Thursday, August 10, 2017
Friday, June 30, 2017
The Deadbolt gets some new tires (AUSTAR AX-5020)
So I bought some Chinese ripoffs on Ebay. I don't usually like to buy ripoffs but in this case I didn't realize that they were ripoffs until after I bought them.
I was looking for 120mm tires with a nice tread pattern to replace the RC4WD Super Swampers that I was running. So when I saw these AUSTAR AX-5020 tires I was impressed by the look.
And I really liked the look of the rims they were on. $30 for a set of 4, I couldn't say no. (Amazon has them for about $38 Click Here)
After I bought them I was looking around and found that the tires are copies of the new Proline Hyrax 1.9 tires and the rims are copies of Gmade's NR-02 wheel. Needless to say I saved a crap load of money buying the Chinese versions.
I was looking for 120mm tires with a nice tread pattern to replace the RC4WD Super Swampers that I was running. So when I saw these AUSTAR AX-5020 tires I was impressed by the look.
And I really liked the look of the rims they were on. $30 for a set of 4, I couldn't say no. (Amazon has them for about $38 Click Here)
After I bought them I was looking around and found that the tires are copies of the new Proline Hyrax 1.9 tires and the rims are copies of Gmade's NR-02 wheel. Needless to say I saved a crap load of money buying the Chinese versions.
Monday, June 19, 2017
Chica and Chavez get a ride!
So I got tired of the molded in driver on the deadbolt so...
I cut him out and replaced him with a 6 inch figure.
I added one to the passenger seat too. I got them both at a local $5 and under store.
They are some of those wrestling figures. They fit perfect.
Chavez and Chica (at least that's the names they use now!) have themselves a nice off-roader to take them on all sorts of adventures. You see, Chavez and Chica are in the import/export transportation business. They move "Items" through less conventional methods usually avoiding customs, inspections, bills of lading and other such "Official Channels". This new vehicle will certainly be handy.
I cut him out and replaced him with a 6 inch figure.
I added one to the passenger seat too. I got them both at a local $5 and under store.
They are some of those wrestling figures. They fit perfect.
Chavez and Chica (at least that's the names they use now!) have themselves a nice off-roader to take them on all sorts of adventures. You see, Chavez and Chica are in the import/export transportation business. They move "Items" through less conventional methods usually avoiding customs, inspections, bills of lading and other such "Official Channels". This new vehicle will certainly be handy.
After I cut the original driver out I cut a small piece of lexan I had laying around and painted it black to fill in the hole left by the original driver. The steering wheel was one of the extra pieces that came with the Deadbolt.
Saturday, May 27, 2017
Chassis Servo Mount w/Panhard Bar
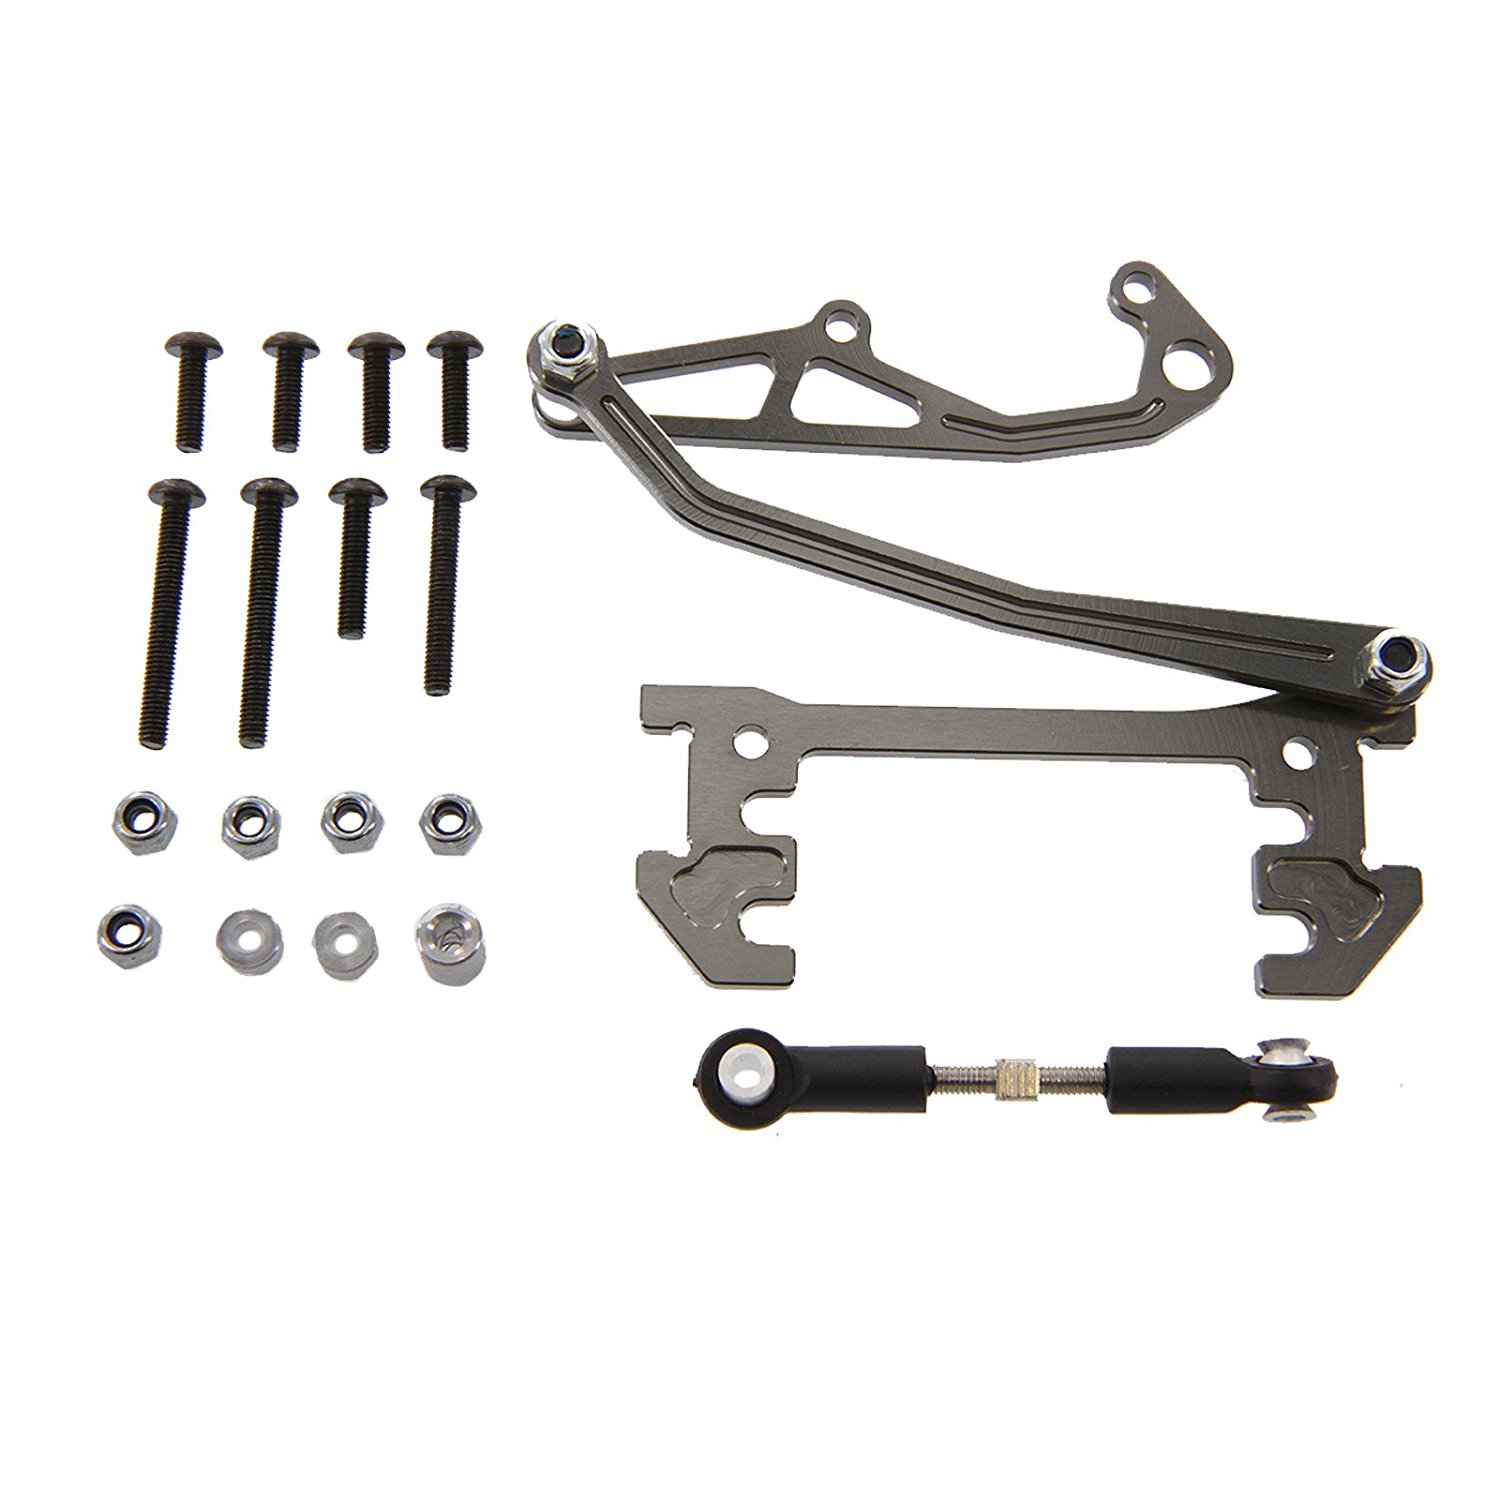
I installed a Chassis Mounted Servo and Panhard Rod kit.
No instructions but that's ok. It's not to terribly hard to figure out.
I had to disassemble mine and change some things around to get it to work on my SCX10 Deadbolt.
But they give you all sorts of spacers and bolts to set it up the way you need it.
Installing it is sort of strange. It just slides in between the frame rails (you need to remove the bumper/cross members).
I used a couple of zip ties to lock it into place.
It looks great and works very well. Just pay attention and put your steering rod on the same side as where the panhard rod connects to the axle.
Tuesday, May 16, 2017
1:10 Roof Luggage Rack with LED Light Bar
It's not intended for the Deadbolt but it works and looks great. I removed the original lightbar from the Deadbolt and tossed it aside. I couldn't use the supplied nuts to mount it because there is no roof to mount it on! Instead I used some black zip-ties and strapped it to the cage in a few locations.
It seems to be very solid. I've already rolled the truck over several times (one serious tumble, tumble, roll, bounce) and it's not bent or anything. I really like it.
| 1:10 Roof Luggage Rack with LED Light Bar |
Yeah Racing Dual Motor Steel Cable Winch #YA-0511BK Review
Picked this up the other day, it's the Yeah Racing Dual Motor Steel Cable Winch #YA-0511BK

Very cool and really fast. This model came with a pre-wired DPTT (Double pole triple throw) switch that allows you to manually control the winch without a 3rd channel. Flip the switch one way and it rolls out, put the switch in the middle position and it stops, flip it the other way and it rolls in.
With 2 motors it's fast and strong.
When I first hooked it all up it didn't want to work.
Turns out I had to reverse one of the sets of wires from the motors. The two motors were turning against each other.
Once I flipped that around it was working great!
I guess they just tossed two pre-wired motors onto it and didn't think about the fact that one needs to go the other direction!
I wish these people would think about how you're supposed to bolt this thing on though. The 4 bolt slots (at least they are slots so you have some work around room) are all under the motors. First I removed the mounting plate from the winch and used it to mark and drill the holes to mount it (the stock Poison Spyder bumper is not setup for a winch). Then I re-attached the mounting plate to the winch (and used Loctite). Then I had to use a pair of Hemostats to hold the nuts in place while I worked the bolts up thru the bumper (they do supply all the necessary mounting hardware) . It was a bear and there was much cursing going on for sure but I finally got them all on (again, with Loctite).
I mounted the control switch in the passenger side of the drivers compartment. I was going to mount it on the bumper but I was afraid that the switch might get caught up on a branch or something and accidentally get turned on. I didn't want it trying to spool in and burn up the motors.
With 2 motors it's fast and strong.
When I first hooked it all up it didn't want to work.
Turns out I had to reverse one of the sets of wires from the motors. The two motors were turning against each other.
Once I flipped that around it was working great!
I guess they just tossed two pre-wired motors onto it and didn't think about the fact that one needs to go the other direction!
I wish these people would think about how you're supposed to bolt this thing on though. The 4 bolt slots (at least they are slots so you have some work around room) are all under the motors. First I removed the mounting plate from the winch and used it to mark and drill the holes to mount it (the stock Poison Spyder bumper is not setup for a winch). Then I re-attached the mounting plate to the winch (and used Loctite). Then I had to use a pair of Hemostats to hold the nuts in place while I worked the bolts up thru the bumper (they do supply all the necessary mounting hardware) . It was a bear and there was much cursing going on for sure but I finally got them all on (again, with Loctite).
| Yeah Racing Dual Motor Steel Cable Winch #YA-0511BK |
Subscribe to:
Posts (Atom)